
Supported options for the "Image" texture type

Supported options for the "EnvMap" texture type
The Blender image name (IM) will be exported as the DEF name for the "ImageTexture" node. Movie textures are prefixed with "MOV_".
To apply textures to an object in Blender, add a new material on the "Material" panel then add a new texture on the "Texture" panel.The BS Exporter for Blender supports the following common options:
| Blender | VRML/X3D mode |
|---|---|
| MipMap | mipmap |
| UseAlpha | materialAlpha |
| CalcAlpha | transparent |
| Rot90 | flips texture coordinates |
The following special texture types also have their own specific options:
VRML and X3D support only one texture per texture channel and one material per mesh. If you use multiple materials and multiple textures per texture channel please split your mesh into parts for correct export.
Blender can create environment maps of your scene on render and you can save them to disk.
Supported options for the "Image" texture type
Supported options for the "EnvMap" texture type
To specify that a texture or movie be exported to a BS Contact "MovieTexture2" node, use the texture type "Image" and activate the "Movie" button on the "Image" panel.
Not all media types supported by BS Contact are visible in Blender (although Quicktime *.mov and Video *.avi work well). If you experience problems in mapping any movie texture, as a workaround you can create a temporary placeholder image of the movie, save it with the movie name and file extension and use it for mapping. After export, the placeholder image can be replaced with the original movie.

Exporting BS Contact's "MovieTexture2" node
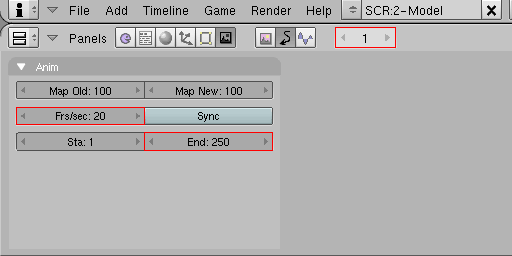
Setting animation Frs/sec (frames per second)
When using multi-texuring you can blend different texture blend modes to create various effects. In the older Blender 2.37a, it is necessary to also specify mappings on the "Map To" panel:
| Blender mode | Blender 2.37a "Map to" | Exported VRML/X3D mode |
|---|---|---|
| Mix | Col | REPLACE |
| Multiply | Col + Csp | SUBSTRACT |
| Add | Col + Spec | ADD |
| Screen | Col + Amb | ADDSMOOTH |
| Substract | Col + Cmir | MODULATE |
| all others |
SELECTARG1 | |
| Neg | RayMir | COMPLEMENT_ |

Supported Texture blending modes
UV mapping (creating texture coordinates so textures are positioned correctly on an object's faces) within Blender is very powerful. To add and edit texture coordinates, firstly switch "Viewport Shading" to "Textured", then select "UV Face Select" mode and use the "UV/Image Editor" tool.
Using the "UV/Image Editor", you can create UV mappings independently, i.e. without having to add a new material and texture on the "Material" and "Texture" panels respectively. In the absence of a material, the exporter outputs shadeless textured objects (i.e. the object and its texture are unaffected by standard VRML/X3D lighting).

The "UV Face Select" mode in Blender

The "UV/Image Editor" in Blender
[ return to top | return to overview ]